Got an Apple Pencil and you’re not quite sure what to do with it? No worries! The Apple Pencil is full of potential, and once you get the hang of it, it can improve how you use your iPad. Whether you're an artist, into digital planning, or simply love cool gadgets, the Apple Pencil is definitely a must-have. To help you make the most of this accessory, here are 10 tips and tricks that will take your iPad experience to the next level.
1. How to pair your Apple Pencil
Before you dive into the fun stuff, let’s start with the basics: pairing your Apple Pencil with your iPad. This is a super simple process that gets your Pencil ready for action in just a few seconds. If you’re using the first-generation Apple Pencil, start by popping off the cap at the end of the Pencil to reveal the Lightning connector. Plug it into your iPad’s Lightning port, and you should see a prompt on the screen asking if you want to pair the devices. Just click "Pair," and you’re good to go!
For those with the second-generation Apple Pencil, pairing is even easier. Simply attach it to the magnetic connector on the side of your iPad (compatible models only), and it will automatically pair with your device.
2. How to charge your Apple Pencil
Running out of battery can be a bummer, but charging your Apple Pencil is incredibly straightforward. If you have the first-generation model, just plug it back into the iPad's Lightning port, or use the included Lightning adapter with a USB cable. Amazingly, this quick charge can give you about 30 minutes of use from just a 15-second charge, making it easy to keep going, even when you’re on the move.
The second-generation Apple Pencil charges wirelessly when attached to the magnetic connector on the side of your iPad. No cables, no hassle – just snap it on and let it charge. It’s a seamless process that ensures your Pencil is always ready when inspiration strikes.
3. How to check Apple Pencil battery life
Wondering how much battery life is left in your Apple Pencil? It’s easy to keep track with the iPad’s Today View. Simply swipe over to the Today View from your home screen or lock screen, and you’ll find the Battery widget displaying the current charge level of your Apple Pencil. If you don’t see the Battery widget, don’t worry – you can add it yourself. Scroll to the bottom of Today View, tap “Edit,” and then hit the “+” button next to the Battery widget. Now you’ll always know when it’s time to recharge.

4. How to replace Apple Pencil tip
Over time, you might notice that the tip of your Apple Pencil starts to wear down, especially if you use it frequently. A worn-out tip can affect the sensitivity and accuracy of your Pencil, but replacing it is super easy. Luckily, Apple includes a spare tip in the box when you purchase your Pencil, and additional tips are available for purchase if you need them. To replace the tip, simply unscrew the old one by turning it counterclockwise, then screw the new one in by turning it clockwise. It’s a quick fix that will keep your Pencil performing at its best.
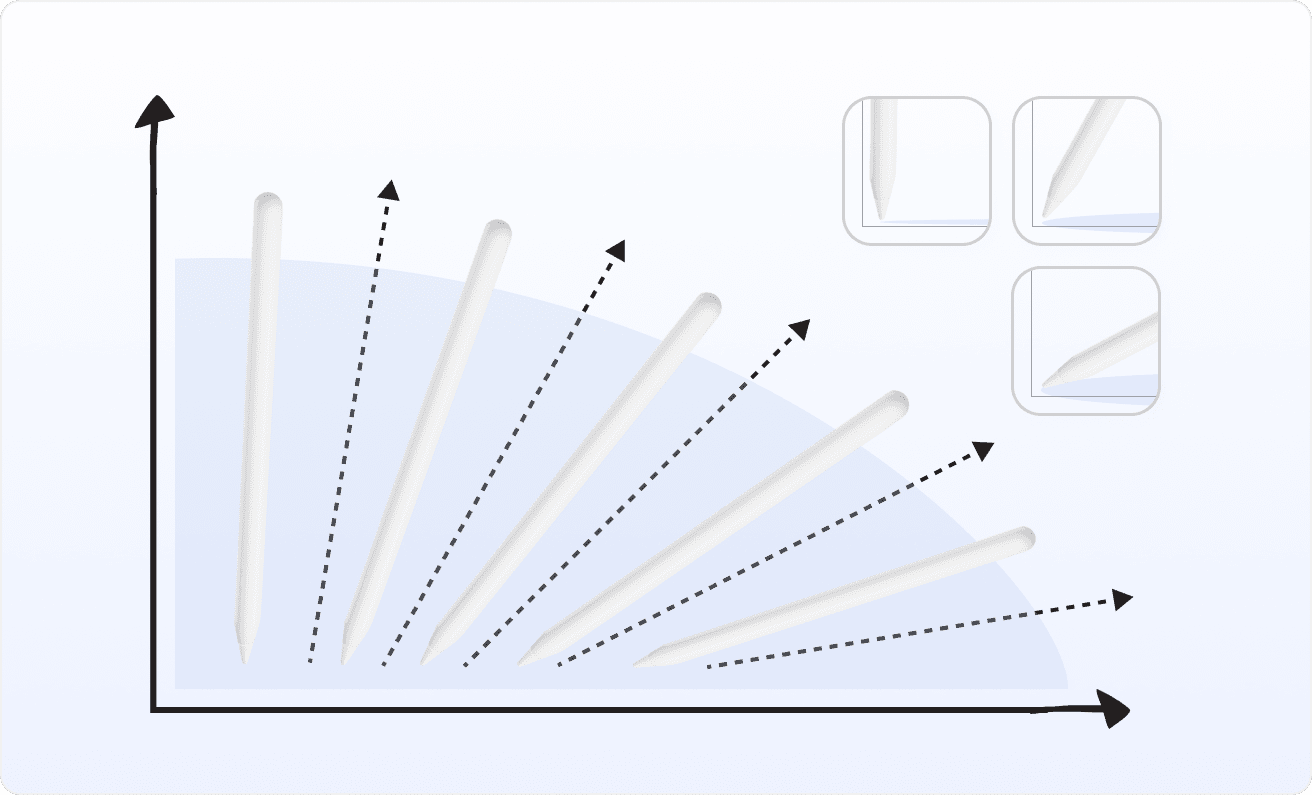
5. Get creative with pressure & tilt
One of the most exciting features of the Apple Pencil is its ability to respond to pressure and tilt. This makes it an incredibly versatile tool for artists and designers. When you press harder on the Pencil, the lines you draw become darker and thicker, just like using a real pencil. Tilt the Pencil, and you can create shading effects, giving your digital artwork a more natural and nuanced look.
Experimenting with these different pressures and angles can unlock a whole new level of creativity. Whether you’re sketching, painting, or just doodling, playing around with these features will help you discover what the Apple Pencil is truly capable of.
6. Palm rejection
If you’ve ever tried to draw or write on a touchscreen with a stylus, you know how annoying it can be when your palm accidentally makes marks on the screen. Thankfully, the iPad’s palm rejection feature solves this problem. When you use the Apple Pencil, the iPad is smart enough to recognize and ignore your palm resting on the screen, so you can focus on your work without worrying about stray marks or unintended inputs.
This feature makes the Apple Pencil feel more like using a traditional pen or pencil on paper, providing a comfortable and intuitive drawing experience. Whether you’re taking notes or creating detailed artwork, palm rejection ensures your screen stays free of distractions.
7. Drawing straight lines on iPad
Sometimes, even the steadiest hand needs a little help drawing a perfectly straight line. The good news is that the Notes app on your iPad has a built-in ruler feature that can help. To use it, open a note and tap the ruler icon at the bottom of the screen. You can then move the ruler around with your fingers and draw along its edge with your Apple Pencil. This simple tool is perfect for creating precise lines, whether you’re sketching a quick diagram or adding some structure to your artwork.
If you're using GoodNotes 6 for your digital planning, you can take this a step further by learning how to use hyperlinks to navigate your planner seamlessly.
8. Instant notes from lock screen
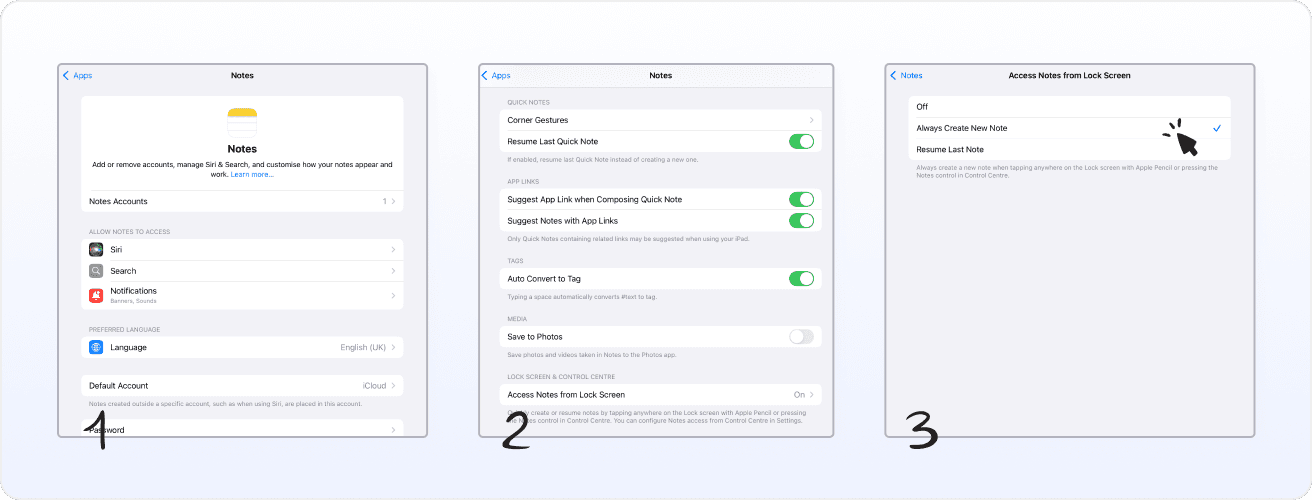
One of the Apple Pencil’s most convenient features is the ability to start taking notes directly from the lock screen. Just tap the screen with your Pencil, and you’ll be taken straight into a new note in the Notes app. This is perfect for those moments when you need to jot something down quickly without unlocking your iPad and navigating to the app.
You can enable or disable this feature by going to Settings > Notes > Access Notes from Lock Screen. If you like to keep things streamlined and efficient, this feature is a real time-saver.
9. How to search handwritten notes
Gone are the days of frantically flipping through pages to find that one important note. With the Apple Pencil and iPad, you can search your handwritten notes just as easily as you would typed text. In the Notes app, simply pull down the note list to reveal the search bar, type in a keyword or phrase, and the iPad will highlight all instances of that word in your handwritten notes.
This powerful feature uses advanced handwriting recognition technology, making it easier than ever to keep your notes organized and accessible. Whether you’re a student, a professional, or just someone who likes to stay organized, the ability to search handwritten notes is a game-changer. Curious about whether digital planning is right for you? Check out our pros and cons of planning to help you decide.
10. Scan and sign Documents
In today’s digital world, scanning and signing documents is a common task, and the Apple Pencil makes it easier than ever. Using the Notes app, you can quickly scan documents with your iPad’s camera and sign them directly on the screen. To get started, open a new note, tap the + button, and select "Scan Documents." After capturing the document, you can use your Apple Pencil to sign it, add annotations, or fill out forms.
This feature is perfect for professionals who need to handle paperwork on the go or anyone who wants to streamline their document management process. With the Apple Pencil, you can say goodbye to printing, signing, and scanning – everything you need is right at your fingertips.
Conclusion
These 10 tips are just the beginning of what you can do with your Apple Pencil. The more you explore and experiment, the more you’ll discover its potential. Whether you’re drawing, taking notes, or signing documents, the Apple Pencil is a powerful tool that enhances the iPad experience in countless ways. So, don’t be afraid to dive in and start creating – the possibilities are endless!
Remember, the key to getting the most out of any new gadget is to keep exploring and trying out new things! Your Apple Pencil is no different. Have fun discovering all the amazing things it can do, and enjoy the journey of learning and creating with it! For more tips and recommendations on enhancing your digital planning experience, check out our ultimate iPad accessories guide for digital planners.